
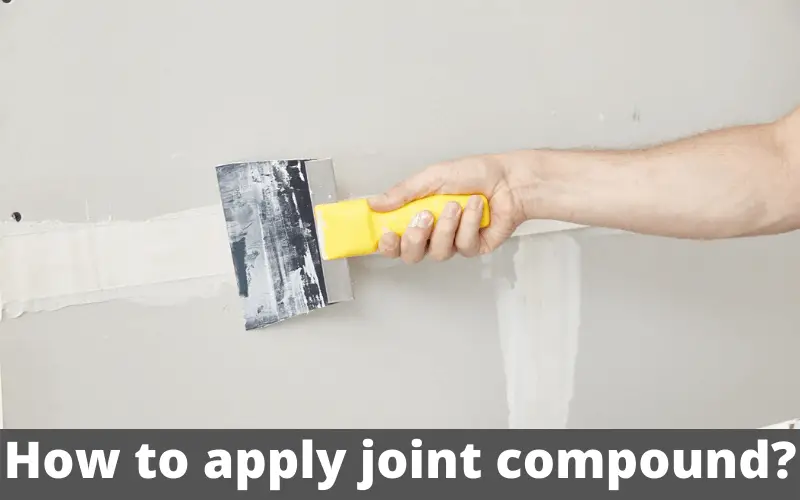
The all-purpose joint compound, also known as dry mud, can be a gamechanger if you use the right one. It’s designed to do it all – filling, taping, texturing, and finishing.
Joint compound has excellent adhesion. It’s super easy to spread and sand. Again, it’s water-soluble, so you can go through a lot of trial and error processes with it by water troweling it. So, it’s totally beginner-friendly. But if you’re new to this and looking for some guidance on how to apply joint compound, we’re here to help.
Lucky for you, we will be covering the ways to apply joint compound to walls and ceilings. Besides, we will share some drywall mudding tips and tricks so that your home renovation work can never go wrong! Scroll down to learn.
Another interesting read: Best Joint Compound For Skim Coating
How To Apply Joint Compound To Drywall
You can easily tape drywall and mud the seams between the adjacent sheets using the joint compound. Follow our tips to do it right and reduce the amount of sanding needed. Here are the things you’ll need to complete this project:
- Drywall Tape
- Joint Compound
- Sand Paper
- Corner Bead
- Drywall Knives of 6 and 12 inches
- Corner Trowel
- Flat Tray
- Utility Knife
- Bucket
- Spray Adhesive
How To Apply Joint Compound Tape
- Take a flat tray and spread joint compound on it, so it’s easy to access using a knife.
- Start by filling out the nail holes using the 6-inch drywall knife. Hammer in any stand out screws. Smooth the gaps with dry mud.
- Apply the compound along the horizontal seams between the drywall sheets using the knife.
- Tape the horizontal seams while it’s still moist. Press the tape over the compound every foot or so to keep it smooth and hold it in place.
- With the tape in place, apply a layer of compound over the tape with an 8-inch drywall knife at a slight angle. Move the knife over the tape to embed it and remove any excess compound.
A tip: Avoid overlapping the tape to get a seamless finish.
How To Apply Joint Compound To Corners
- Apply a thin coat of the drywall mud to the inside corners of the wall using a 6-inch knife. Start from the topmost and work your way down the wall.
- Fold drywall tape in half. And run it down the height of the wall pressing it into the damp compound. Press the tape in every 12 inches until you reach the floor.
- Drip the corner trowel in water, so it glides smoothly over the tape. Use it to smooth the tape against the wall. Start from the top, and trowel it in a downside motion.
- For the outside corner, use the corner bead. Spray adhesive to ensure the beads stick to the wall. Wear gloves as the process can be a bit messy.
- Press the corner bead against the wall every 12 inches starting from the top.
- Apply dry mud over the corner bead. You’ll need to use plenty. Work from top to bottom and smooth as you progress.
Now, let them dry for 12 hours. Apply the second coat over the seams and outside corners with a slightly wider knife. Use the corner trowel again for the inside corners. Let it dry overnight.
Before you go for the third coat, tidy up any rough part with the help of sandpaper and the edge of a drywall knife. For this coat, thin the compound with water so it dries quickly. The consistency should be like the mayonnaise. You can use the topping compound too. Use a wider knife – like 10 or 12 inches, to apply the finishing layer. Feather out all the edges. Left it to dry.
Pro Tip: Use a damp sponge to smooth out any rough parts. It also works well to clean the surface and collect dust from the sanding. Ta-da! Your drywall is now all ready to be primed for painting.
How to Apply Joint Compound To Ceiling
Improve the look and texture of the ceiling by applying a skim coat of joint compound. You can also hide the imperfection and give it a smooth and seamless finish.
Now, if you’re a newbie, you might be asking, How to apply a skim coat of joint compound? We’ve got you covered. Here’s what you need to do to make the ceiling all new again:
Skimming can be done without any extra preparation. But if the paint is peeling or the plaster is popping, wipe them off gently using a putty knife.
If you’ve got a shiny ceiling paint before, wipe it off using a degreaser and then scrape it with sandpaper. You can also prime the ceiling with flat paint and let it dry completely before you start to skim coat.
You’ll need:
- 5-gallon bucket of joint compound
- An empty bucket
- Water
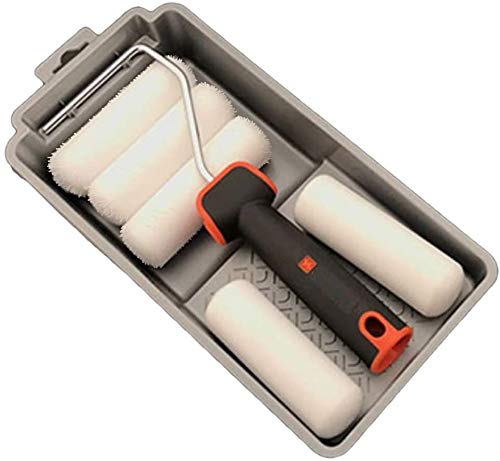
- Paint roller
- 12-inch taping knife
- 6-inch taping knife
- Paint roller tray
- Sand Paper


- Now, first place plastic sheets across the floor to catch the drips. Wrap the exposed wires using electrical tape.
- Start by taking out 1 or 2-gallon joint compound and pour it into the empty bucket. Add a small amount of water to it. Use a drywall mixture that comes attached with an electric drill. Mix them thoroughly. Make sure the consistency is not too thick. Add more water if needed. But don’t dilute too much, it will make it too runny to apply on the ceiling.
- Pour some mud into the tray.
- Attach the extendable handle to the paint roller.
- Now dunk the roller into the mud and get rid of the excess mud by dripping off a bit.
- Now slide the roller real quick on the ceiling.
- Cross roll to spread it out evenly.
- Smooth it out with the 12-inch taping knife. For tricky corners, use the 6-inch knife to get better control.
Voila! You’ve done with the first skim coat. Now, wait for 24 hours to dry it out completely. When you notice it has changed its color from a grayish to nice clean white, assume it’s ready for the next coat. If your mud doesn’t lose all the moisture before you go for the next layer, it will crumble and crack over time.
So, you might be wondering how to apply a second coat of joint compound? Start by sanding off with sandpaper where it’s needed. And then follow the steps given for the first coat.
Wait for another 24 hours to dry and then sand and apply a third coat if required.
Another must-read: Joint Compound vs Plaster
Tips and Tricks To Mud Your Drywall Like A Pro
Here are some do’s and don’ts to level up your mudding game like never before:
- Don’t use your hand to mix the powdered compound with water. You might miss some lumps of powder if you don’t stir long enough. Use an electric grill to save time and energy. Again, it’s the tidy process of mixing.
- Don’t apply the next coat before the first one dries completely. It will result in a cracky outcome.
- You may wonder, how do you speed up joint compound drying? To speed up the process, warm air can be a great help. So, turn on the heater or fire up the furnace. You might be thinking, can I dry joint compound with a hair dryer? Yes, obviously!
- To let out the trapped moisture, open the window and turn on the fan to speed up the joint compound’s drying even more.
- Prefill the gaps as the material is prone to shrink. If you fill out the gap and apply the initial skim coat at the same time, it will give an amateur appearance.
- After you’ve applied drywall tape vertically, cut the tape to avoid overlapping before you embed the tape horizontally.
- Don’t forget to sand off any ridges before you apply further coats.
Frequently Asked Questions
Can I paint directly on joint compound?
The joint compound will absorb the paint’s moisture and give a dull and flat look. So before you apply paint, follow these steps to get the most vibrant look out of it:
* Clean the wall with a damp sponge. Vacuum the dust from the floor.
* Apply a high-end primer that can absorb the paint better.
* After it dries, gently sand the wall with fine sandpaper to avoid any nubs in the paint.
There you have the walls ready to be painted as you wish!
Do you need to add water to joint compound?
Well, when you apply it to the corner bead, you can use the packaged consistency. But you need to thin it down before tapping the seams and going for the second and third skim coat.
How long does joint compound take to dry?
It depends on the type you’re using. The all-purpose one needs 24 hours to dry, but the hot mud dries way faster. It is designed to dry more quickly, just like plaster in 20 to 60 minutes.
Do I need to prime joint compound before painting?
Yes. As the drywall mudded with compound can’t absorb paint like the PVA in primer can. So use a high-build primer and wait till it dry. Scrape off to get rid of any ridges and then go for painting.
Can you add water to the premixed joint compound?
Yes, you can’t use it right out of the bucket, as it may not spread that easily. Thin it down by adding water until you come up to the correct consistency.
Can you mix joint compound by hand?
Well, we suggest you do not. It’s not worth it as it’s labor-intensive, and you might leave some powdered lump unattended. So use a power grill instead.
Do you sand joint compound between coats?
Yes. If you don’t sand them between coats, the previous coat’s imperfection won’t go and you won’t get a seamless wall as the final outcome.
How do you sand joint compound smoothly?
You can sand it smooth with fine sandpaper or using the edge of a drywall knife.
How thick can I apply joint compound?
You should apply joint compound as thin as possible as applying a thick layer will cause it to shrink and crack. So lay it evenly using thin layers.
Can I apply joint compound over paint?
If the paint isn’t glossy, you can. Otherwise, prepare a solution of strong detergent that has trisodium phosphate in it and warm water. Wet a sponge in the mixture and rub the wall well. Left it to dry. Brush it off and spread a coat of drywall primer. Now it’s ready for a skim coat.
Conclusion
Now that you know how to apply all-purpose joint compound, what’s stopping you from getting into the work and make your home wholesome again? So, go get the type of joint compound you need from the nearest home improvement and jump into the renovation work.
